The WMV Productions Case Studies are designed to give you a look into our production…
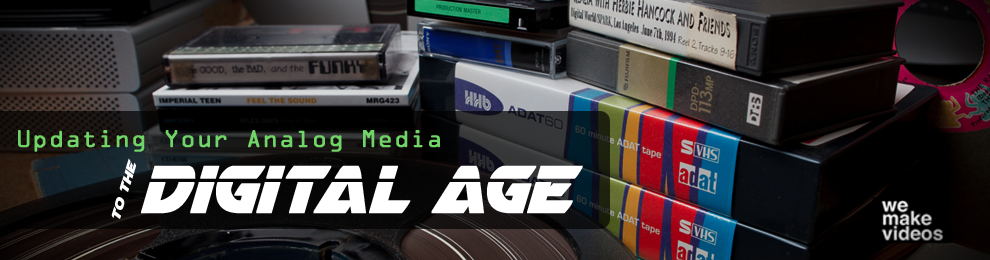
Video Production Tutorial: Updating Your Analog Media to the Digital Age
With Christmas right around the corner, many folks look for unique or interesting gifts to give their loved ones. Yet sometimes the most endearing gifts we can give are something we already have. Memories of a bygone era like slides, photos, records, reel to reel audio, movie films, or even audio or video cassettes often sit abandoned in our homes. Often times people no longer have a means of viewing these sources. But just because you can no longer view them doesn’t mean they don’t still work.
So I’m here to help get guide you on the steps you can take to update and convert some of this old media to a longer lasting digital format. Something important to remember is that many of these older formats will not last forever. Photos and slides can fade, while the magnetic signal that makes a VHS function can dissipate over extended periods of time. Someday they will no longer work at all, even if you were able to find an increasingly rare player from which to view them. That is why digitizing these not only makes them more readily accessible, but also keeps them preserved in a format that can last forever. Or at least as long as someone is there to watch them.
So where to begin? That is probably the hardest part of any task. With some simple steps you can move through this process quickly and easily. Of course, the steps will be a little different depending on what you’re working with. Photos require a much different process than converting a VHS tape for example. So today let’s focus on those tapes. After all they’re pretty common among families today as the format was most popular during the mid 80’s through to the late 90’s. If you’re reading this, there’s a good chance that includes you.
Converting VHS Tapes
So as I mentioned before, VHS tapes are a form of analog media, using magnetic tape running across playheads to form the picture and audio. But many people don’t know or have forgotten that VHS wasn’t the only type of tape out there. Beta tapes (separated into BetaCam and BetaMax) were actually a superior product to the VHS. However, due to marketing and the difference in price, the VHS won in the marketplace. Even so, it doesn’t exclude the possibility that your family’s treasure trove of memories aren’t one or the other.
 The first step is to identify what you have. Remember that tapes come in many different shapes and sizes. The image here will help you identify the type of tape that you’re dealing with. Each will have slightly different requirements when it comes to converting them. Though often times the differences will be minute, such as requiring only a different type of player, it’s knowing those differences that will lead to a successful conversion. Each of the tapes you see here will require a unique type of player to run them. This player could be a full deck, like a vhs player, or even a camera that uses that specific format to record to. The exception is the VHS-C. Simply put, it is a compact version of a full VHS that was widely used as cameras began to shrink in size. If you intend to use a full deck to convert with, you’ll want to get an adaptor that the VHS-C fits into that will make it compatible with a standard VHS player. Something that is common to all tapes is a small tab or switch along the side. Some of them are actually broken off to engage, while some of the smaller sized tapes have switches that can be switched on and off. These tabs or switches are used to prevent the tapes from being recorded to. You’ll want to make sure that these are set to protect your tapes. You wouldn’t want to get this far only re-record over the very memories you’re trying to save!
So, once you know the format or possibly multiple formats you’ll be using, it’s time to get your hands on a player. Here again you’ll have a few options, but generally speaking the two best methods will be a camera or a full deck. This is something you’ll need, as there just isn’t a way around the need to be able to play the original video tapes. If you plan to purchase the device online, I would strongly recommend either finding it on a reputable site like ebay (which provides buyer protection). If you are going to a physical electronics store, you may need to find a local shop that still sells those older players or cameras. Often times big chain stores like Best Buy or Wal Mart don’t even carry these old players anymore. But if you do, be sure to make sure it works before you purchase it. If you’re lucky enough, the best option would be to see if older family members or friends still have theirs lying around. It’s free, more likely to be the format you need, and honestly just easier to obtain. In either case, make sure you also have the cables needed to power the device and to output your signal.
So now you have your tapes and you have your player, but now what? Well in order to convert them, you’ll need to make a choice as to how you want the final product. Your main options here are producing either discs or files. But let’s break these options down, as there is something you’ll need to know before proceeding. A disc such as a DVD can really be used a few different ways. The first would be burning it so that it can be used in a DVD player, just like a movie. Alternatively, it can be burned as a Data DVD that makes it more like a hard drive. It won’t be recognized in most DVD or Blu-ray players, but it can be used to store files which you can access with your computer.
A file is more straightforward in that when you produce it, it’s generally the final product. Like any other file it can be burned to a disc, kept on your computer, copied to computers or flash drives, etc. Given where society has progressed, this is the option I would recommend. DVD’s are on the verge of disappearing, and even the more modern Blu-ray is already an obsolete technology. The digital age of today is dominated by the digital file. They’re just more versatile. A huge perk to this is that your files can be uploaded to file sharing or backup services online so that they remain protected. Let’s say your house burns down. Physical materials like discs can be damaged or destroyed in such an event, leaving you with nothing. But if you had files that were backed up online, they would remain safe. There is also the huge perk that files can later be used to make discs. So really there just isn’t much reason to convert your media to a disc. This will save you money in the long run as a file only requires a computer to run. And you won’t need to buy discs for each little project.
But just in case you do need disc, I’ll give you some information you’ll need to make them. A standard DVD holds 4.7 gigabytes of information. Alternatively, this means it holds just around 2 hours of SD footage. These two limitations are crucial to understand if you’re planning to use discs for files or video DVD’s. There are some ways to increase the amount you can get on a disc, but it involves some more advanced knowledge, and will also degrade the quality noticeably during the conversion. Remember also that if you are looking to simply make a video DVD, you can look for a deck that is designed to convert tapes to DVD. I try to avoid these as they are often plagued with issues, and generally only convert a single format, limiting what can be done. So for now let’s move on.

When it comes to conversion there will be one major hurdle. The signal you’re outputting from your device will be an analog signal, and will often use the standard RCA cables (the Yellow, Red, & White cable that you 90’s kids will know instantly). Now most computers out there don’t have a means of accepting the signal. Some older machines may have the capability, but it’s rare at best these days. So you’re best bet is to purchase a third party converter. This device acts as the hardware element that will convert the analog signal to a digital signal. Physically it takes the RCA cable, and outputs it to a USB connection, so that you can hook your tape deck or camera directly to your computer. A great example of this is the Elgato Digital Converter system. It is not the only brand out there and I always recommend shopping around first, but it is a good example of what you need for this process. This particular device only outputs to H.264 (which is a version of mp4 file that is universally recognized on both Mac and PC). It’s important to note that if you have the option, PC’s generally work better with mpeg files. Mpeg, mp2, and mp4 are the most common file extensions, with the latter being the best option. Mac tends to prefer mov files, but as I said earlier they can also understand mp4 files.
So finally we have everything we need. Our tapes, our player or camera, the converter, and of course a computer. If you need Discs, I would always recommend buying DVD-R’s. This is the most stable and universally recognized disc format. Try to stay away from DVD-RW or DVD+R’s. Once you have all the software installed for your converter, and you have tested to make sure everything is functioning the way it should (always test to make sure the video and audio comes in clear), then you’re ready to roll. Before you start your conversion, here’s a trick. Always fast forward your tape to the very end. Once it stops and/or before it begins it’s auto-rewind, reset the counter on the deck or camera so that it returns to all zeros then rewind the tape. This is important because tapes can be set to many different recording speeds or may not always be full. So if you reach the end of the tape, and rewind to the beginning, you should have a negative number that will be equal to the length of the recorded video. The number on the counter is how much control track (video) is actually on the tape. Knowing how much is there gives you a good idea of just how much time the tape will run. Since this is a real-time process, it means you know roughly how long that tape will run before it’s finished converting. Sometimes there will be gaps between video or long blank areas which do not contain video that will throw off that number, but generally the amount of video will be close to the conversion time.
And there you have it. I know there’s a lot there to remember but it’s a very easy process once you do it a time or two. The hardest part will be getting your hands on a working player, but once you do it’s all downhill from here. I’ll provide a checklist here for you to refer to when taking on this process:
- Collect the tapes you want to convert. Check in all the usual hiding spots like movie shelves, attics, closets, or even out in the barn.
- Identify just what type of tape or tapes you’ll be working with. (Use the picture shown above for a visual depiction).
- Once you know just what type of tapes you have, find a player that works for each. Remember this can be either a full deck designed for home use or even a camera. Remember to make sure that the tabs on your tapes are set to block recording.
- Obtain a converter that will allow you to attach your analog camera or deck to your computer.
- Install any software needed to run the device, and it’s usually a good idea to check for software updates.
- Test your set-up to make sure you are getting good video and audio quality. If you are not, make sure all connections are tight. Otherwise it could be the tape itself is damaged or the player may need to be cleaned or repaired.
- Time the tape using the method I outlined.
- Convert your tape to a digital file
- Enjoy!
Now of course there are so many more types of older media that can be converted, and several ways you can go about tackling them. I’ll write more articles covering those later, but for now you know that being capable of converting those old tapes is something within your reach. But like all processes it does take time and practice to get through it all. In major cities, there are often companies or individuals who offer these conversion services. Just search for them online, being sure to add your city or location to get better results for more local service providers.
I hope this article has been informative on the process. I’ll be back with more articles meant to teach you how to turn those old photos and films to digital files on another day.
Happy Converting!
Related Posts